
Check your mobile phone!
When you receive the confirmation text, follow the instructions to receive your coupon code!
How To Set Up A Snowboard
If your new to snowboarding, setting up your board and bindings can feel like a daunting task with an endless list of width, angles and direction combinations to choose from. Luckily for you, we are here to help make setting up your new board a breeze. Hit play above or scroll down through our extensive guide on how to properly determine whether you are regular or goofy footed, as well as recommendations on finding a stance width and binding angles that will be comfortable to suit your riding style and ability.
Here's what we'll cover:
SNOWBOARDS


BINDINGS


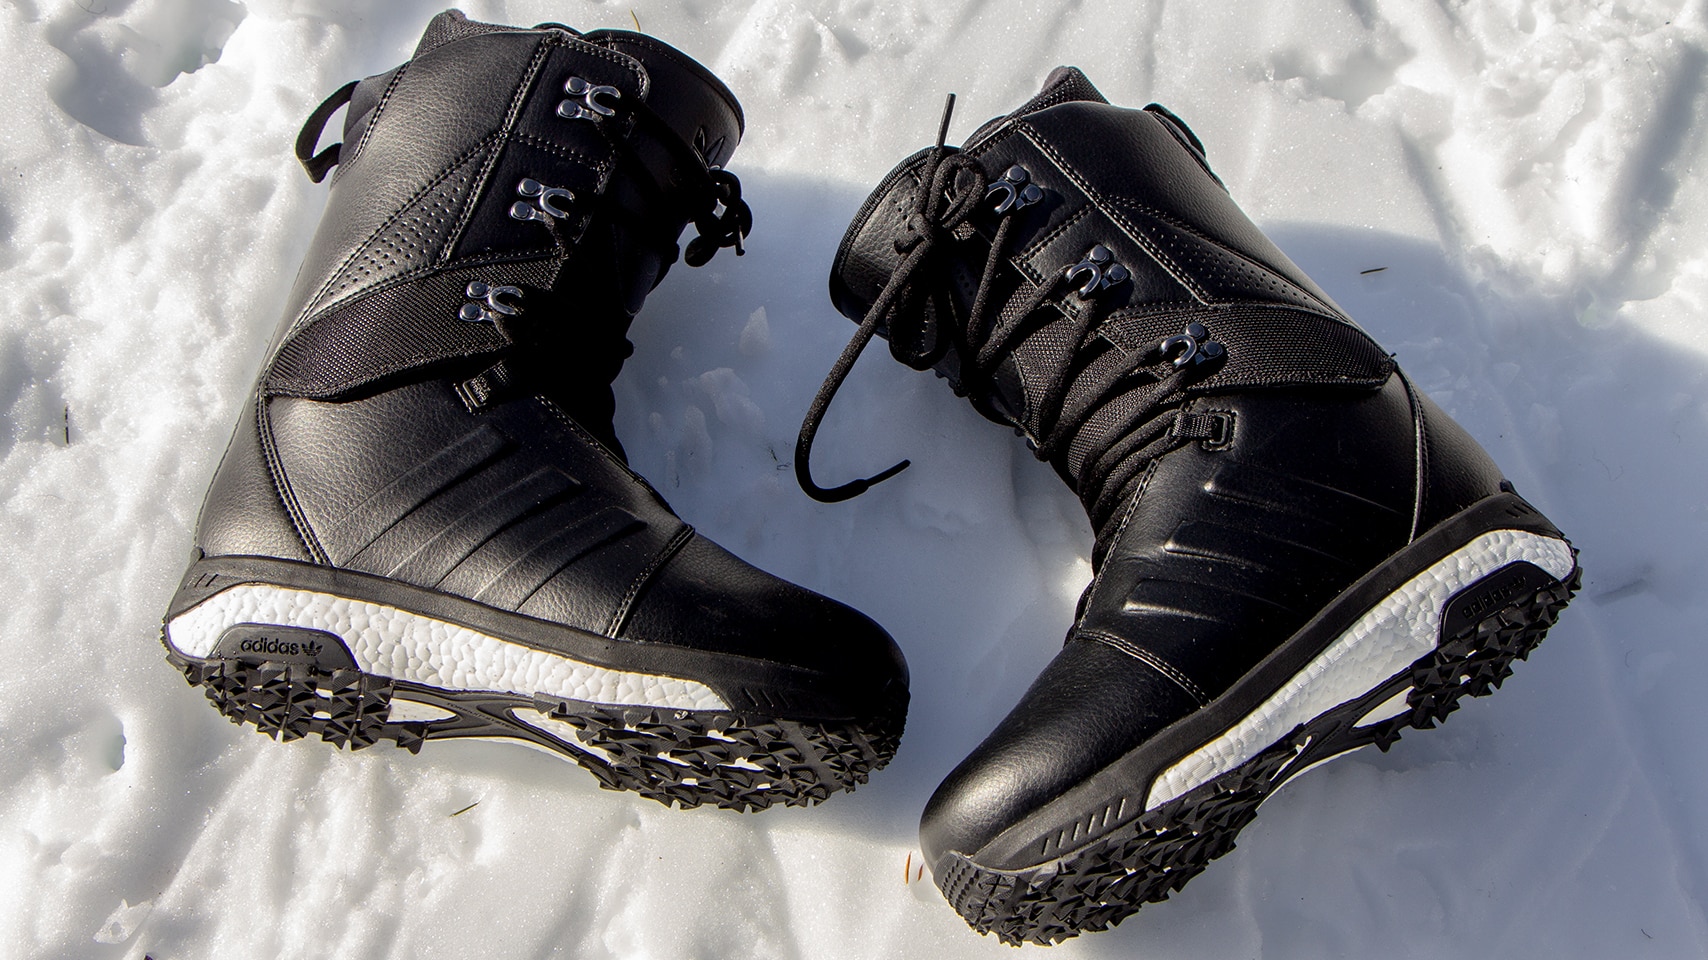
BOOTS


Snowboard Stance
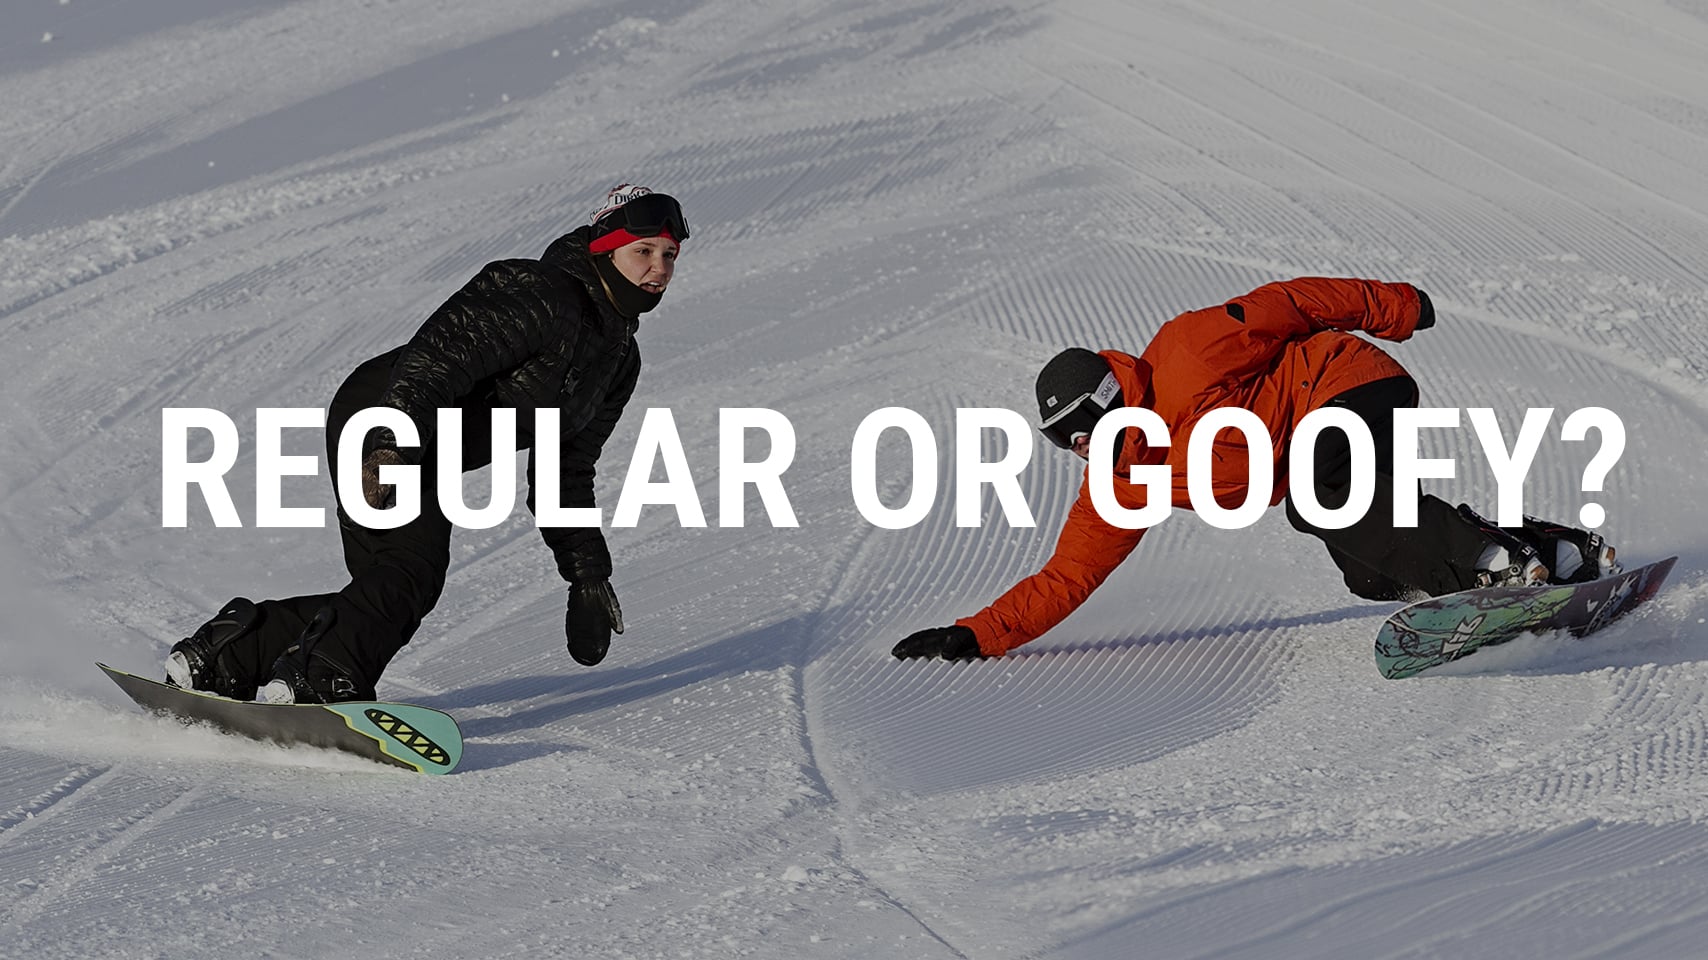
Determining if you are regular or goofy is the first thing you will need to do before you begin to set up your new snowboard and bindings. The terms regular and goofy refer to which foot you lead with while riding. Regular riders have their left foot facing downhill and goofy riders do the opposite, leading with their right foot. We recommend starting with your more dominant foot in the rear. For example, if you kick a soccer ball with your right foot you will most likely prefer a regular stance. If you have ever surfed, skated or done any other type of board sport then we suggest starting with the stance that worked for you in the past.
Your set up is easy to adjust. If regular stance doesn’t feel comfortable, switch things up and try goofy, or vice versa.
Binding Position
With your ideal stance determined, the next step is to set the placement of your bindings. Proper bindings placement differs slightly depending on whether you’re riding a twin, directional or asymmetric snowboard. It is recommended that you reference the "Recommended Stance" markings on the top of your board when mounting your bindings.
If you are unsure what the shape of your board is please reference our, Snowboard Shapes - Explained guide for further assistance.
CENTERED STANCE
The term "Centered Stance," refers to having your bindings placed symmetrically between the nose and tail of your board. Beginners can benefit from a centered stance as it will allow them equal nose and tail lengths for maximum control. Advanced freestyle riders also prefer a centered stance as it makes landing tricks and riding switch a breeze.
SETBACK STANCE
A "Setback Stance" is defined when the bindings are shifted toward the tail of the board rather than placed symmetrically between the nose and tail. Positioning your bindings towards the tail of the board will help reduce fatigue when riding powder and in some cases help add energy and drive when initiating turns on hardpack. Many advanced freeride and all-mountain freestyle riders prefer this type of stance.
*Note you never want to have your bindings mounted closer to the nose than the tail.
Stance Width & Angle
Once you have determined how your bindings will be placed on your board you will need to determine a comfortable stance width.
When determining your stance width, it is important to remember that there is no right or wrong distance for how wide or narrow your stance is. What is important is that you are comfortable. Most boards will have reference points designated on the top sheet of the snowboard. This is a good place to start but ultimately the decision is up to you and what you feel is most comfortable.
To get a good feeling of what your correct stance width may be, start by standing in a power stance with your knees aligning just outside of your shoulders. This type of stance will allow you the most balance and is great for jumping, leaping and lunging. Once you find a width that feels good for you, measure the distance between your feet starting at the center of each foot. You will use this measurement when placing your bindings on your board.
If you are unsure where to start, the table below recommends a stance distance based on your height.
| Height (in feet) | Width (in inches) |
|---|---|
| < 5'1" | 17-18" |
| 5'2" to 5'4" | 18-19" |
| 5'5" to 5'8" | 19-20" |
| 5'9" to 6' | 20-21" |
| > 6' | 22-23" |
STANCE ANGLES
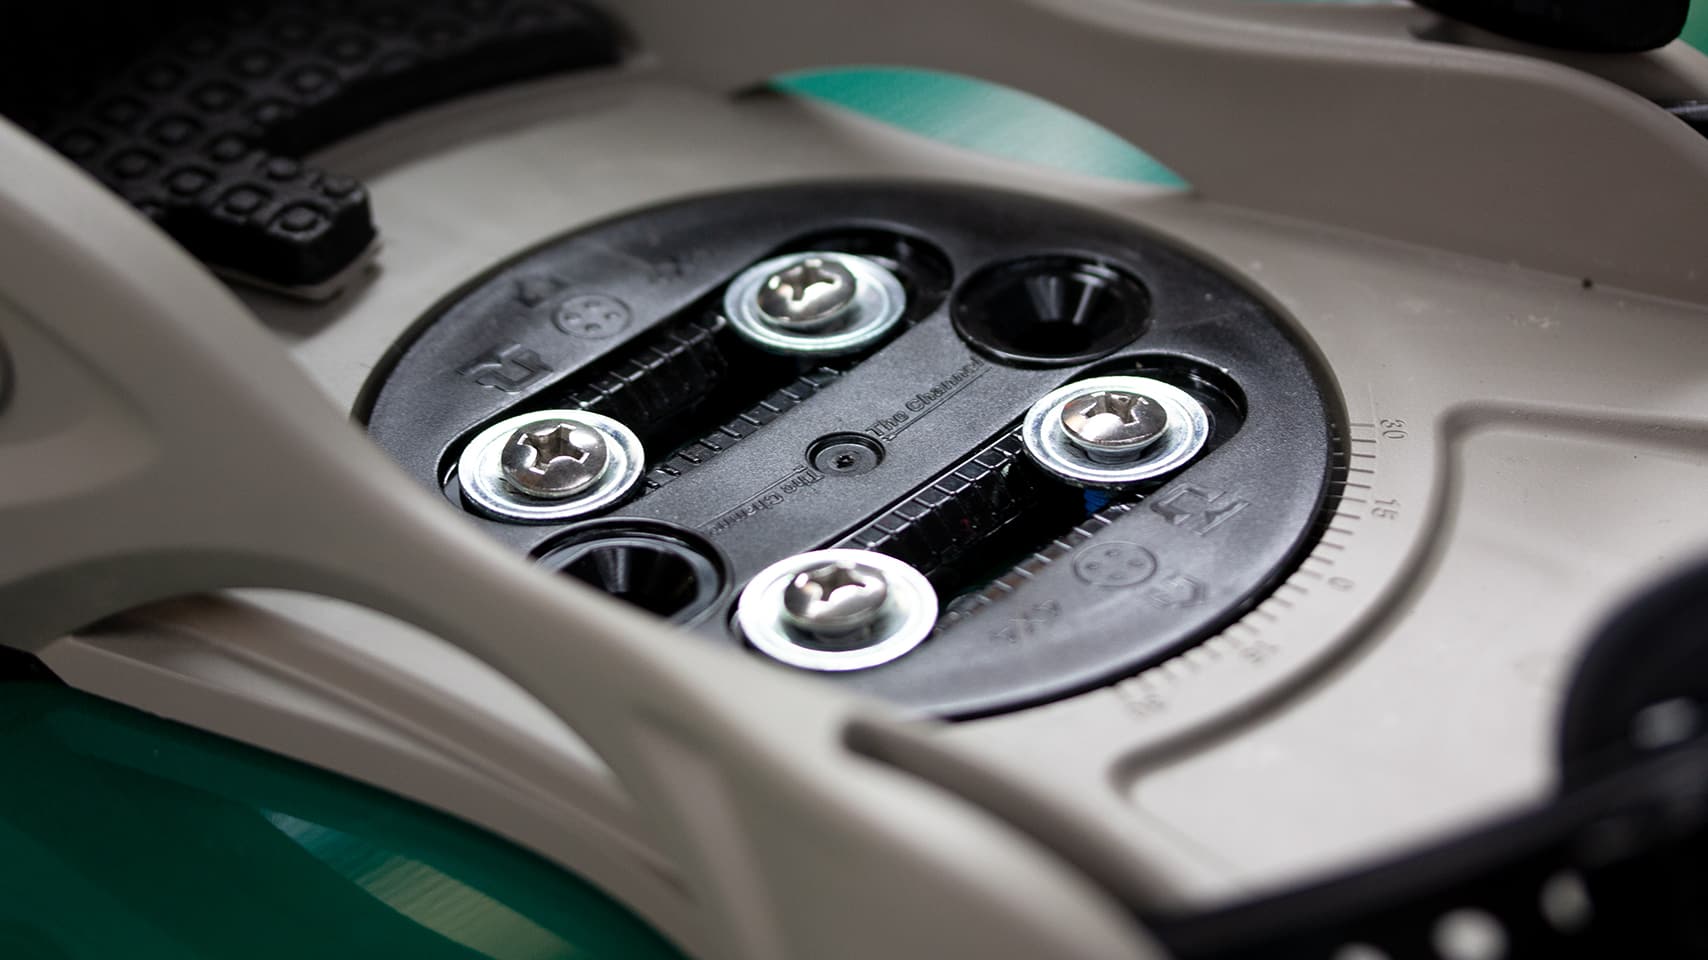
Proper stance angle is key for long term comfort on the mountain. If your bindings are not properly angled you can put unnecessary and often painful strain on your calves and knees resulting in shorter, less enjoyable days. You can adjust the angle of your binding with the mounting disc in the center of your binding. On your binding baseplate where the disc fits into the binding, you will see dash marks with a number every fifth mark. These dash marks are your angles. Set the disc with the indicator arrows pointing to the angle you want and mount the whole thing onto your board. Make sure you measure your width and set back so you are mounting them in the correct place.
Different styles of snowboarding use different stance setups. Most snowboarders prefer a "duck" stance, where your feet are slightly angled away from each other, while some freeride or all mountain snowboarders prefer to have both feet angled towards the front of the board. A common set up for beginners is around -5 degrees on the back foot and +15 degrees or less on the front foot. We don't recommend going past -21 degrees on your back foot because it puts a lot of strain on your knees. However, it’s all about comfort and what works for one person may not work for you.
There is no specific way to set up a snowboard so do plenty of experimenting and tweaking as you progress. Small changes can have a large impact on the way a board feels and responds.
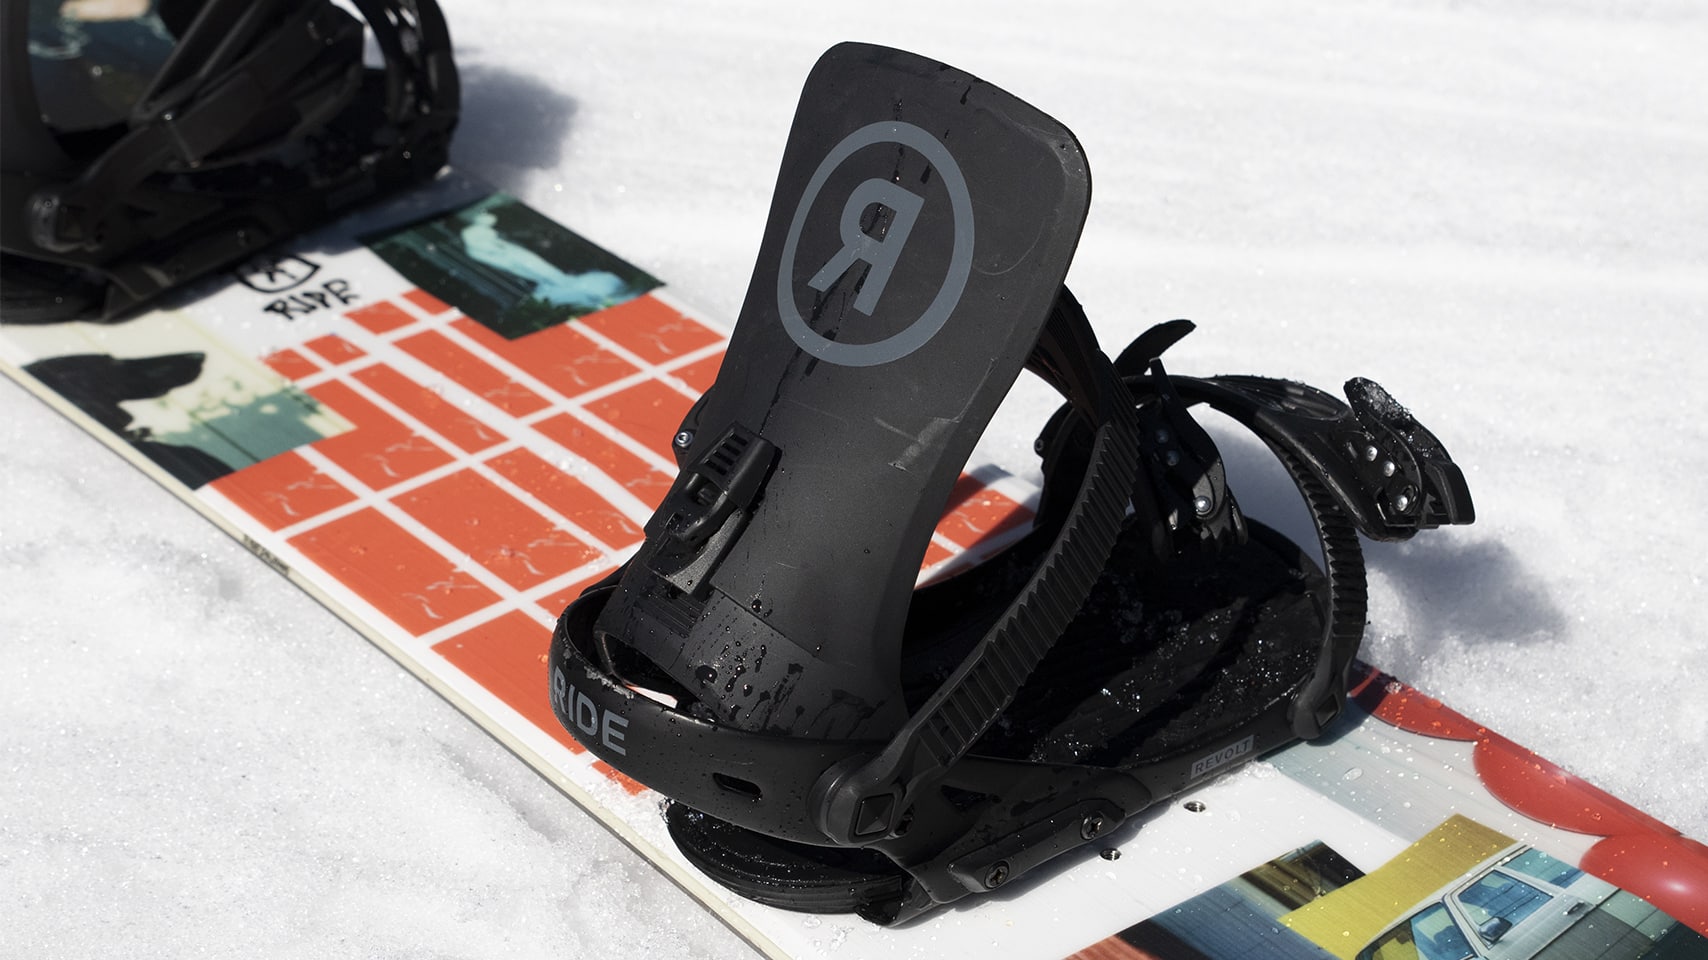
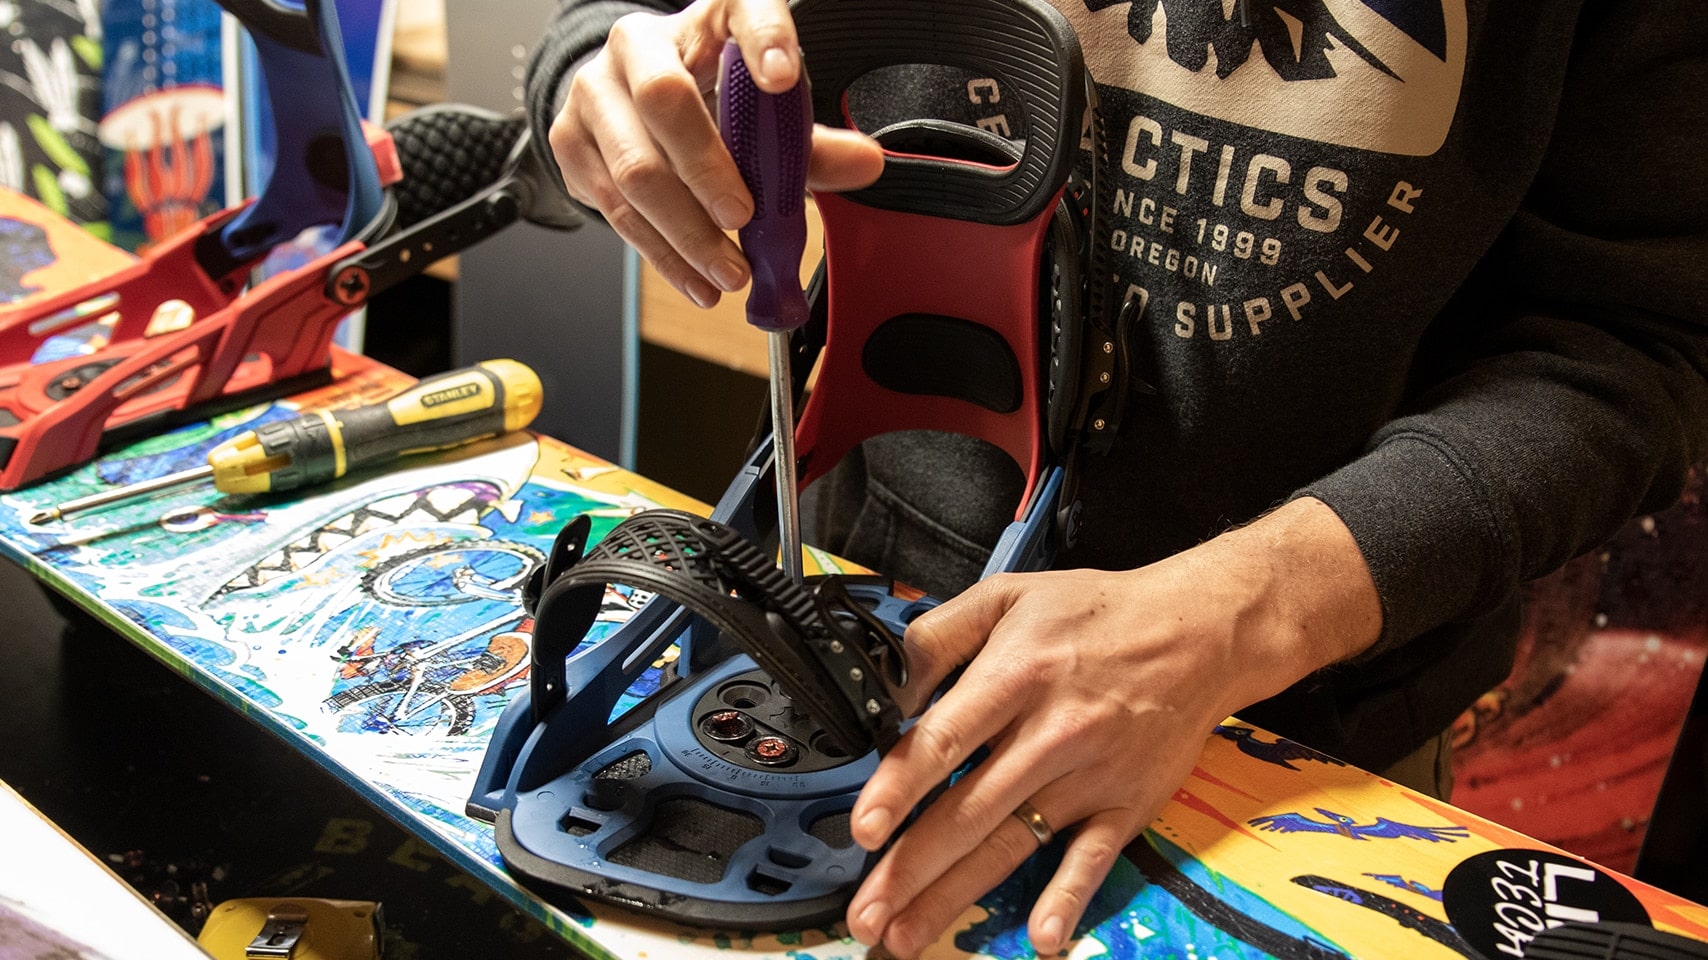
Mounting Your Bindings

Once you’ve figured out where to put your bindings, it’s time to screw them in. First, align the baseplate holes with the inserts that best match your desired stance width. Remember when dialing in our stance width to measure from the center of one binding to the next.
Next, rotate your binding around the disc until you’ve reached the angle you want. Making sure that the base of your binding is centered across the width of your board (with no part overhanging), carefully screw the bindings into place.
WARNING: Never overtighten your screws and never use a bonding adhesive such as Loctite. Doing so may void your snowboard warranty.
Binding Settings
HIGHBACK & FORWARD LEAN ADJUSTMENT
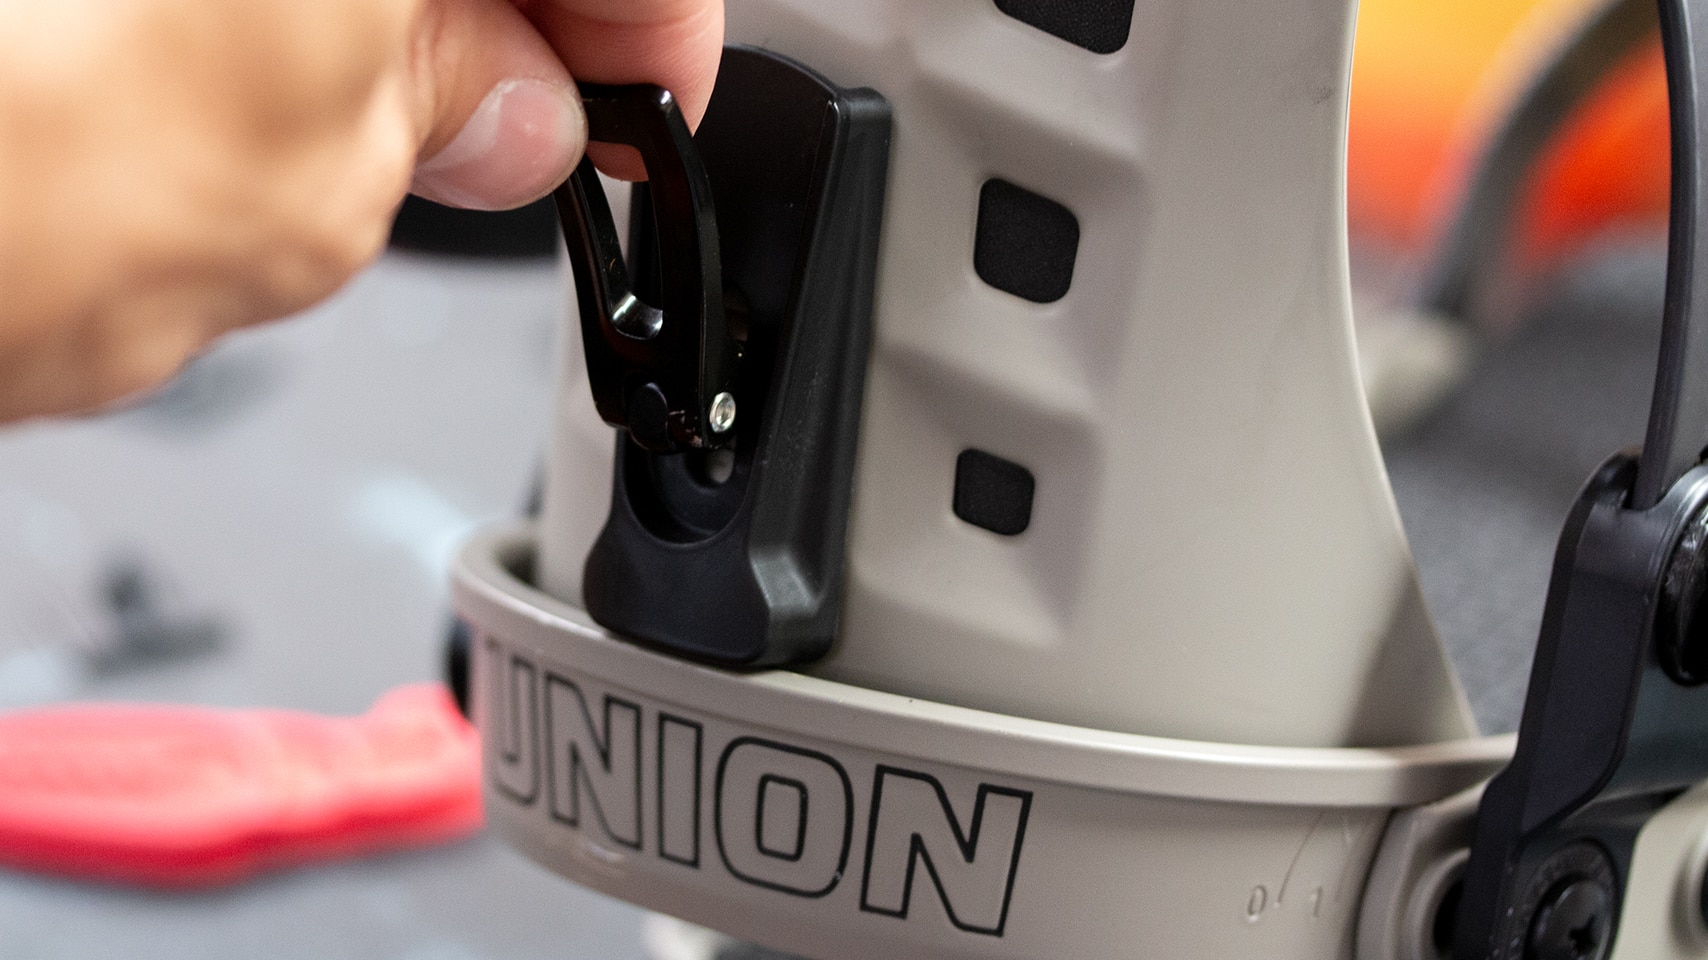
Now that you have your bindings mounted on the board, it’s time to adjust the bindings themselves. Adjusting the angle of the high back or "Forward Lean", will have a large impact not only on the way the board performs but on your body posture.
Angling your high back forward will force your knees to bend giving you a lower center of gravity and more aggressive stance. This is great for half pipe and big mountain riding because it provides better leverage and control for powering through turns. The drawback is that it restricts your leg movement, which makes it harder to catch yourself or make corrections when buttering a box or locking into a rail. Many urban and rail oriented riders prefer to have their high backs pushed as far back as possible, while some big jump enthusiasts like to crank up the forward lean for edge control in the landings and take off. As with everything else, it's all personal preference and you will have to do some experimenting and tinkering to figure out what works best for you.
TOE RAMP & FOOTBED ADJUSTMENT
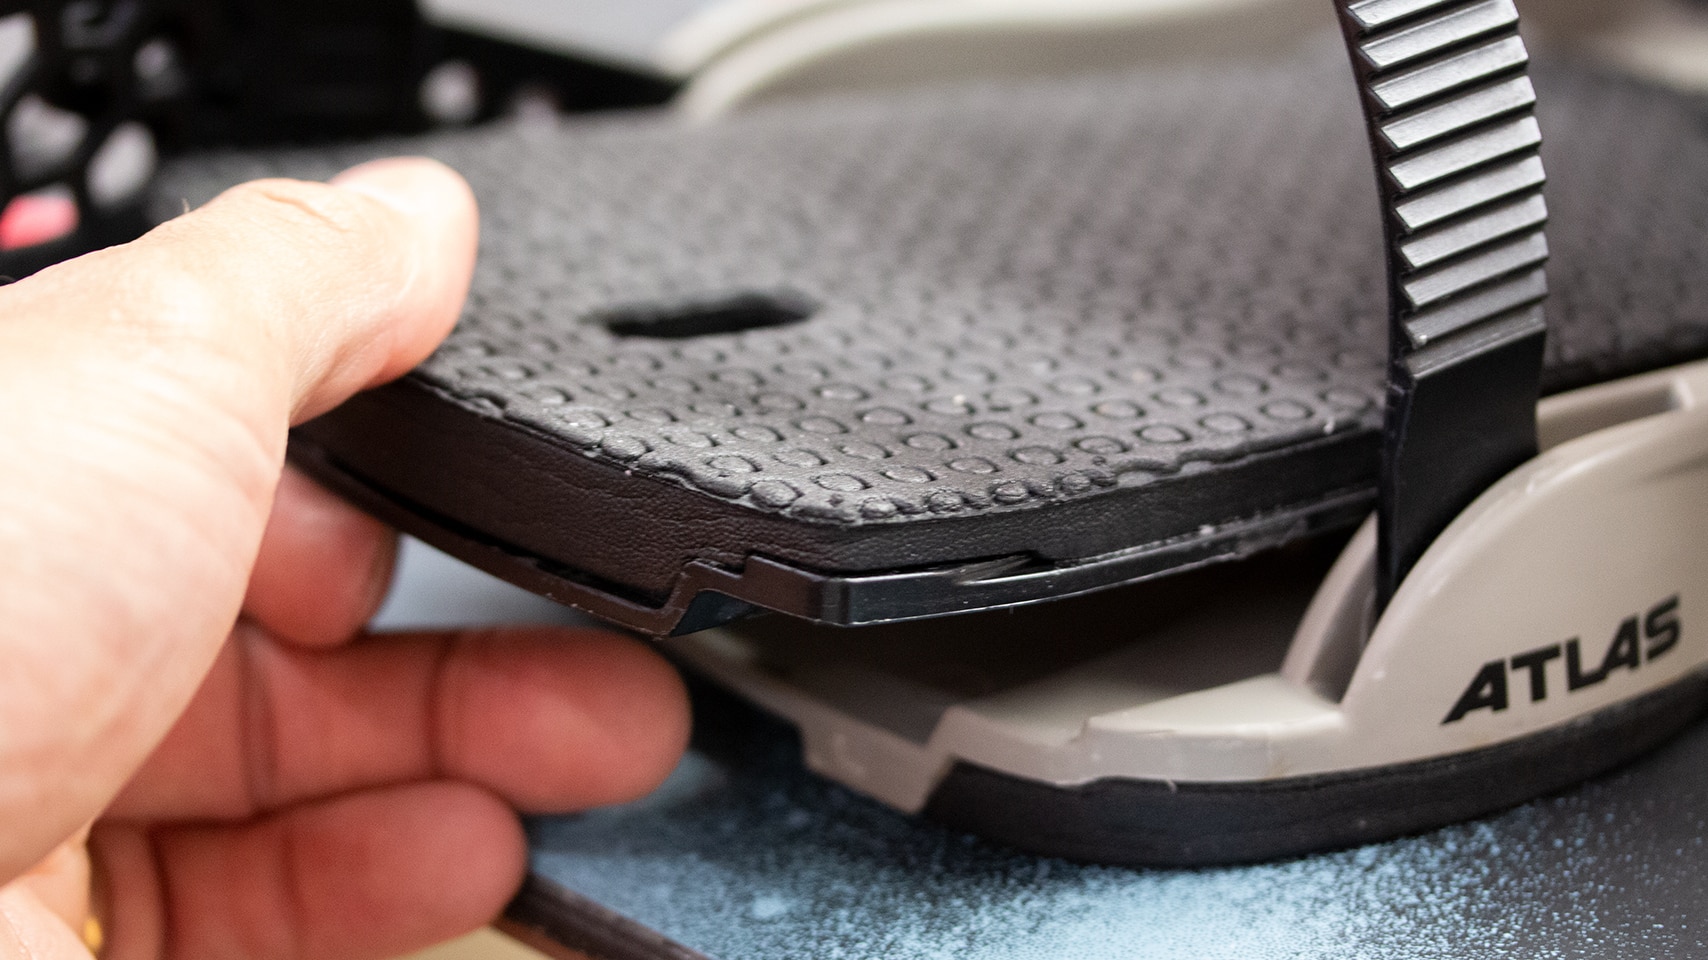
Some bindings may require adjusting the toe ramp/footbed to pair up with your boot size. If so, put your boot in the binding and adjust the toe ramp/footbed to line up with the edge of your toes. This will ensure you’re getting proper leverage when riding.
STRAP ADJUSTMENT
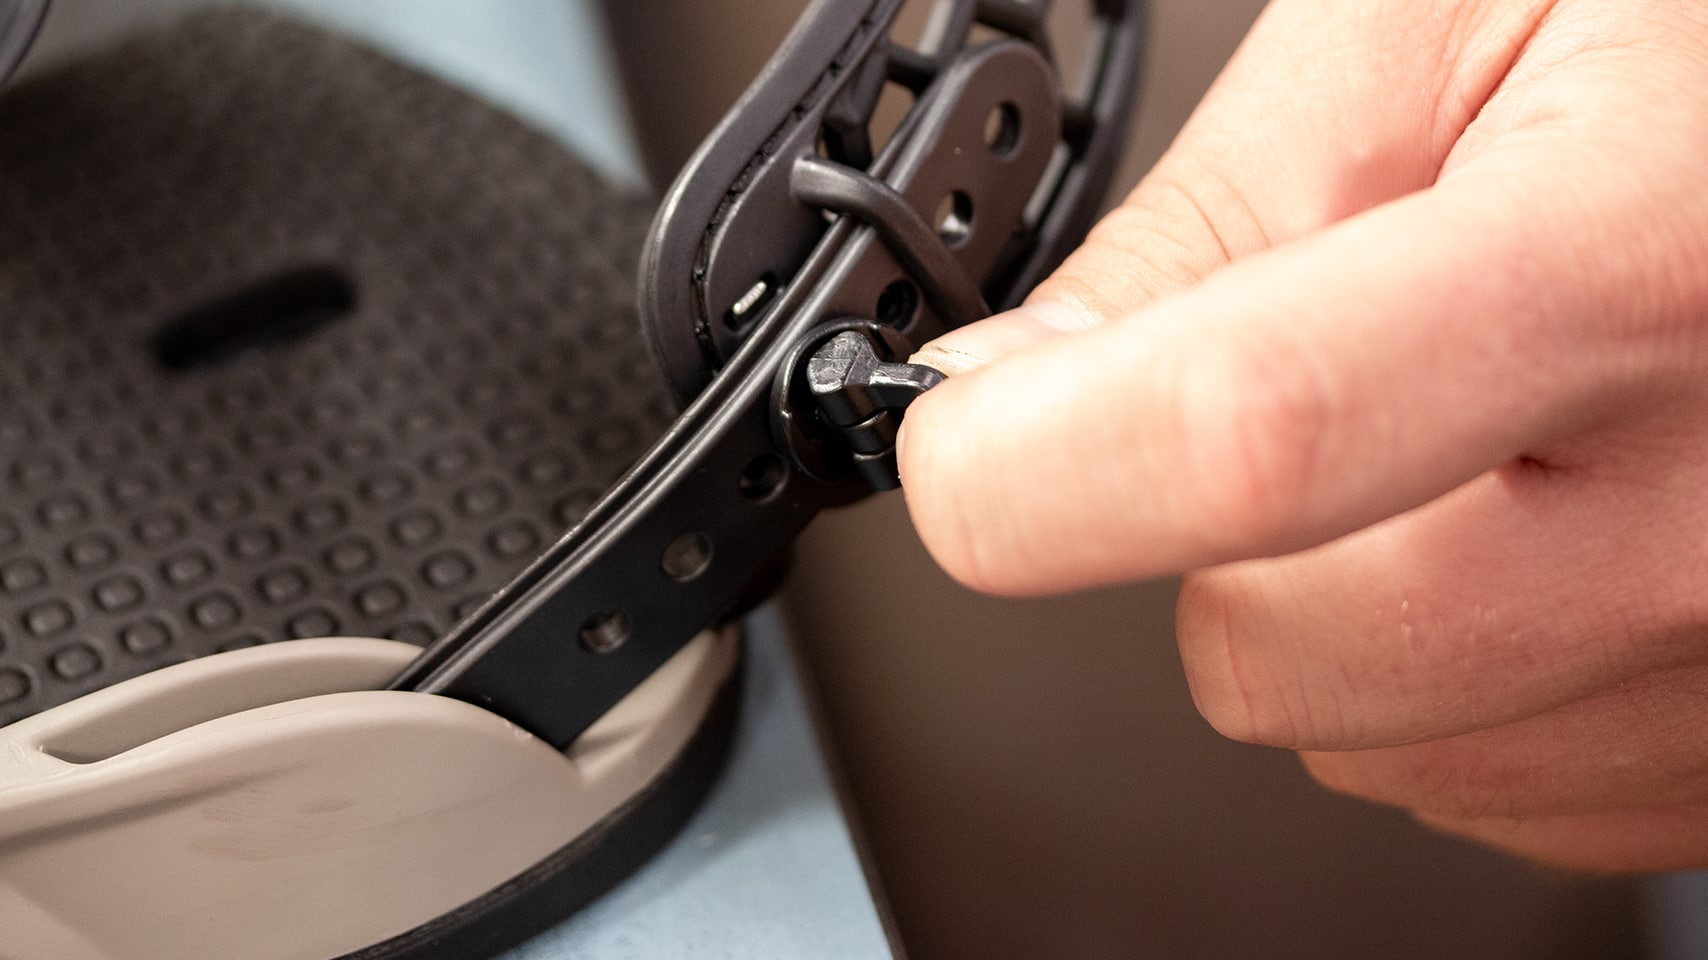
The last thing you will want to do is make sure your straps are adjusted properly to fit you boots. Place your boots in your bindings and make sure both the toe strap and the ankle strap can properly latch and tighten without causing you discomfort. You want the straps to be centered on your boot when fully tightened. This will help push your heel back into your binding’s heelcup for a secure fit and better leverage when turning.
Stomp Pads
The top of your snowboard can be very slick which can make skating through the lift line and unloading at the top of the lift a little treacherous at times. Luckily for you, there are snowboard specific traction devices called stomp pads that provide added grip to keep you on your feet. Stomp pads come in various shapes, sizes and materials but all serve a single purpose; provide extra grip and stability when you need it most. Typically, stomp pads are placed between both bindings where your rear foot will rest when waiting in the lift line or while practicing your best Scott Stevens one-footed maneuver in the park. Other forms of traction can be placed near the edges of the board in key places to provide better leverage when performing grabs.


KEEP LEARNING
Still Have Questions?
We’re here to help. You can call, email, chat or IM during business hours seven days a week. Our customer service staff skates…a lot. They know their stuff and are happy to help you with all things skate.